Buffer size seems like a simple setting—just a number in your audio preferences. But this single parameter has profound implications for your entire production workflow. Too small and you get clicks, pops, and dropouts that ruin takes. Too large and playing virtual instruments feels like performing underwater. Understanding the trade-offs helps you make informed decisions for different production phases and avoid hours of frustration troubleshooting problems that have a simple solution.
What Is a Buffer?
Before diving into settings, let's understand what a buffer actually does. In digital audio, sound is processed in discrete chunks rather than as a continuous stream. A buffer is a temporary storage area that holds audio samples while they wait to be processed.
The Processing Chain
When you play a software instrument or process audio through plugins:
- Audio samples arrive at your interface (from a microphone, instrument, or playback)
- Samples accumulate in an input buffer until there are enough to process
- Your DAW and plugins process the entire buffer of samples
- Processed samples wait in an output buffer
- The interface converts samples back to analog audio for monitoring
The buffer size determines how many samples accumulate at each stage before processing occurs. Larger buffers mean more samples collected before processing, which gives the CPU more time to complete calculations but introduces more delay.
Why Buffers Are Necessary
Buffers exist because computers aren't real-time systems—they're general-purpose machines running many processes simultaneously. Your CPU switches between tasks thousands of times per second. Without buffers, the audio system would need the CPU available at exact microsecond intervals, which no consumer operating system guarantees.
Buffers provide tolerance for this timing variation. If the CPU is momentarily busy with another task, there are still samples in the buffer waiting to be output. As long as the CPU completes processing before the buffer empties, audio plays smoothly.
When processing can't keep up—because the buffer is too small, the CPU is too slow, or the processing load is too heavy—the buffer runs empty ("underrun") or overflows ("overrun"). This causes audible glitches: clicks, pops, dropouts, or in severe cases, complete audio failure.
The Latency Equation
Audio buffer latency follows a simple formula:
Latency (ms) = (Buffer Size / Sample Rate) × 1000
For round-trip latency (input to output), the calculation is more complex because there are multiple buffers in the signal chain:
Round-trip ≈ (Input Buffer + Output Buffer + Processing) / Sample Rate × 1000
Many systems use identical input and output buffer sizes, making round-trip approximately double the single-buffer latency. However, additional latency sources exist.
Additional Latency Sources
Converter latency: Analog-to-digital and digital-to-analog conversion isn't instantaneous. Modern converters typically add 1-3ms total (input + output combined). High-quality converters with longer filter responses may add slightly more.
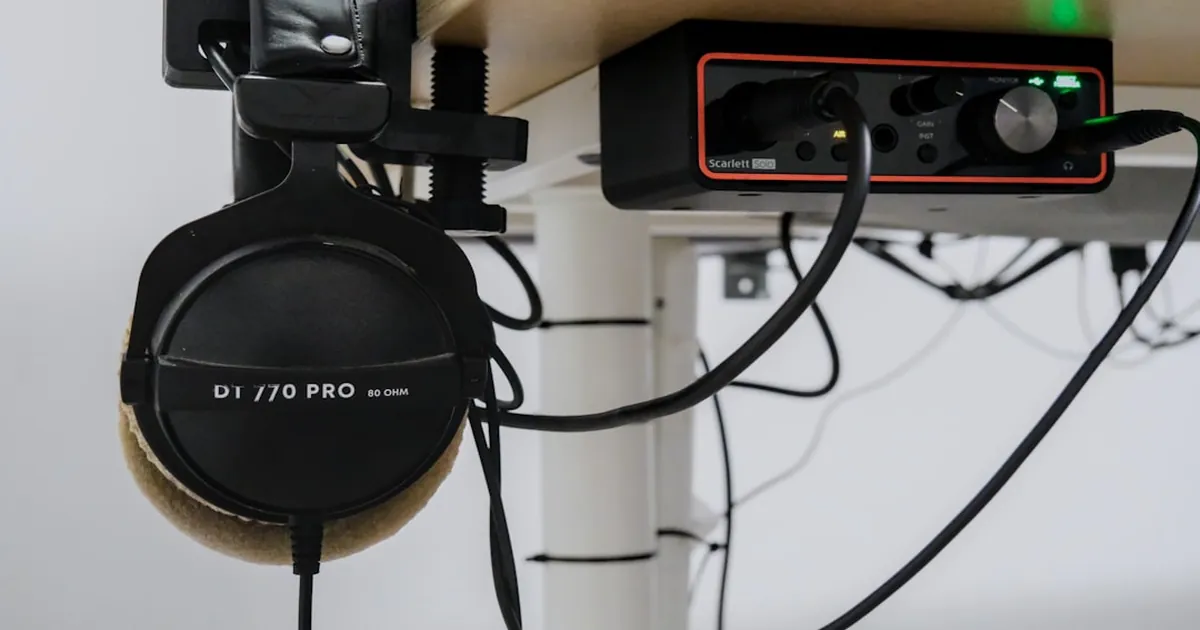
USB/Thunderbolt latency: Data transfer over USB or Thunderbolt adds small but measurable delays. USB 2.0 adds more latency than USB 3.0; Thunderbolt is fastest. Built-in audio typically has higher latency than dedicated interfaces.
Driver overhead: The audio driver itself requires processing time. Well-optimized ASIO drivers (Windows) or Core Audio (macOS) minimize this overhead; generic drivers (Windows DirectSound, MME) add significantly more.
Plugin latency: Some plugins introduce additional delay (look-ahead limiters, linear-phase EQs, convolution reverbs). DAWs compensate for this during playback but not always during monitoring.
Practical Latency Calculations
Let's calculate some real-world examples at 48kHz:
| Buffer Size | One-way | Round-trip (buffers) | Typical total |
|---|---|---|---|
| 32 samples | 0.67ms | 1.33ms | 3-5ms |
| 64 samples | 1.33ms | 2.67ms | 4-7ms |
| 128 samples | 2.67ms | 5.33ms | 7-9ms |
| 256 samples | 5.33ms | 10.67ms | 12-15ms |
| 512 samples | 10.67ms | 21.33ms | 23-26ms |
| 1024 samples | 21.33ms | 42.67ms | 44-48ms |
| 2048 samples | 42.67ms | 85.33ms | 87-92ms |
How Much Latency Is Perceptible?
Perception of latency varies by context and individual:
Under 10ms round-trip: Generally imperceptible for most musicians. This is comparable to standing about 3 meters from a sound source—the sound simply reaches your ears with a slight delay.
10-20ms round-trip: Perceptible to trained ears but tolerable for most tracking situations. Singers and string players may notice and adjust their performance. Drummers often tolerate this range due to strong internal timing.
20-40ms round-trip: Clearly perceptible and problematic for real-time performance. Playing feels "laggy" or "sluggish." Pitch correction during singing becomes difficult as performers hear delayed versions of themselves.
Over 40ms: Unusable for live performance or tracking with software monitoring. Acceptable only for playback and mixing where real-time response doesn't matter.
Buffer Size Strategies
Recording: Go Low
When tracking with software monitoring, latency is critical. Singers pitching against a delayed version of themselves will drift flat. Guitarists playing through amp simulators will struggle with tight rhythmic passages. For recording sessions, drop your buffer as low as your system allows while maintaining stability.
Modern audio interfaces with optimized drivers can achieve 32 or 64 samples reliably on capable systems. This yields sub-5ms round-trip latency—essentially imperceptible to most performers. If you experience dropouts, raise the buffer incrementally until stable, then stop there.
Recording strategy:
- Start at the lowest buffer your interface supports (often 32 or 64 samples)
- Test with your actual session—not an empty project, but with real plugins loaded
- If you get clicks/pops, increase buffer size one step
- Repeat until stable, then stay there for the recording session
- If you can't achieve low enough latency, consider direct monitoring
Direct Monitoring: The Alternative
Many audio interfaces offer "direct monitoring"—routing input signals directly to outputs in hardware, bypassing the computer entirely. This provides zero-latency monitoring regardless of buffer settings.
The trade-off: you don't hear your signal processed through plugins. A guitarist using amp simulation must either hear their dry signal while monitoring (potentially distracting) or live without low-latency monitoring.
Some workflows combine both approaches: direct monitoring for the performer, low-latency software monitoring for the engineer in a control room, or direct monitoring with a small amount of software processing that the performer understands will have some delay.
Mixing: Raise It Up
During mixing, real-time performance doesn't matter. You're adjusting parameters and listening back, not playing live. Raise your buffer to 512, 1024, or even 2048 samples. This gives your CPU breathing room to handle complex plugin chains without dropouts.
Large buffers also reduce CPU overhead from context switching. The audio system calls your plugin processing code less frequently, spending more time doing actual work and less time managing the process. Sessions with 100+ plugin instances see significant benefit from larger buffers.
Mixing strategy:
- Set buffer to 1024 or 2048 samples
- This eliminates most stability concerns and maximizes plugin capacity
- The ~40-90ms latency is irrelevant—you're listening to playback, not performing
- If you use external hardware (synths, effects), consider latency compensation
Live Performance: Find the Sweet Spot
Live performance demands both low latency AND rock-solid stability. You can't accept dropouts during a show, but you also can't play 20ms behind the beat. This requires finding your system's sweet spot—typically 128-256 samples on professional-grade hardware.
Live performance strategy:
- Test extensively before any live performance
- Run your actual set with all plugins loaded for the duration of your show
- Monitor CPU usage and watch for warning signs
- Build in headroom—if your test runs at 70% CPU, expect real performance conditions to push higher
- Have a backup plan (simpler patches, higher buffer setting) if problems occur
- Consider a dedicated performance computer with minimal background processes
System Optimization Tips
Buffer size isn't the only factor affecting latency and stability. System-level optimization can often achieve better results than simply increasing buffer size.
Driver Selection
Windows: ASIO drivers provide the lowest latency and most reliable performance. Use manufacturer-provided ASIO drivers when available. If your interface doesn't include ASIO drivers, consider ASIO4ALL as a fallback, but expect higher latency than native ASIO.
Avoid DirectSound and MME drivers for serious audio work—they add significant latency and lack the reliability of ASIO.
macOS: Core Audio is built into the system and generally works well without additional drivers. Most interfaces work immediately with low latency. If manufacturer-specific drivers exist, they may offer additional features but often use Core Audio underneath.
Linux: JACK provides low-latency audio with proper configuration. PipeWire is increasingly common on modern distributions and offers good latency with easier setup than traditional JACK.
Background Process Management
Disable unnecessary background processes during audio work:
Wi-Fi and Bluetooth: Wireless radios cause periodic CPU interrupts that can cause audio glitches. Disable when not needed.
Cloud sync services: Dropbox, Google Drive, OneDrive—these constantly scan for file changes and can cause CPU spikes. Pause during sessions.
Antivirus real-time scanning: Exclude your audio project folders from real-time scanning. Schedule full scans for non-working hours.
System updates: Disable automatic updates during sessions. A mid-session Windows Update check can cause audio dropout.
Browser tabs: Modern browsers run significant JavaScript that can compete for CPU. Close browsers or use a separate browser profile with no extensions.
Power Management
Power-saving features that are great for battery life are terrible for audio:
- Set power plan to "High Performance" (Windows) or disable "Automatic graphics switching" and "Put hard disks to sleep" (macOS)
- Disable CPU throttling—your processor should run at full speed during audio work
- Disable USB selective suspend—this power-saving feature can cause audio interfaces to disconnect momentarily
- Keep laptops plugged in—battery power often triggers aggressive power saving
USB Configuration
USB audio interface performance varies based on connection:
- Use USB 3.0 ports for USB 3.0 interfaces (blue ports on many systems)
- Avoid USB hubs—connect interfaces directly to motherboard/built-in ports
- Don't share USB controllers with other high-bandwidth devices (webcams, external drives)
- Some systems have USB ports on different controllers—try different ports if you experience problems
CPU and Memory Considerations
Multi-threading: Ensure your DAW's multi-threading settings are appropriate for your CPU. More threads isn't always better—overhead from thread management can outweigh parallel processing benefits.
Memory: Ensure adequate RAM for your sessions. Running out of RAM causes disk swapping, which introduces massive latency spikes. 16GB is minimum for serious work; 32GB+ recommended for large sample libraries.
CPU temperature: Thermal throttling reduces CPU speed when temperature exceeds safe limits. Ensure adequate cooling, especially on laptops. High-performance audio work generates significant heat.
Plugin Latency: The Hidden Factor
Some plugins introduce additional latency beyond the buffer—and this latency can vary dramatically between plugin types.
Zero-Latency vs. Higher-Latency Plugins
Zero-latency (or minimal-latency) plugins:
- Most standard EQs, compressors, and saturators
- Basic filters and distortions
- Simple reverbs and delays (the reverb itself has decay, but no processing latency)
Higher-latency plugins:
| Plugin Type | Typical Latency | Why |
|---|---|---|
| Look-ahead limiters | 1-5ms | Must "see" upcoming peaks |
| Linear-phase EQs | 10-50ms | Math requires processing future samples |
| Convolution reverbs | 10-50ms | Long impulse responses need look-ahead |
| Pitch correction | 5-30ms | Pitch detection requires sample window |
| Spectral processors | 20-100ms | FFT window size determines latency |
Plugin Delay Compensation
DAWs automatically compensate for plugin latency during playback—tracks are offset so everything stays synchronized despite plugins having different processing delays. This compensation works transparently; you don't need to manage it manually.
However, PDC only applies to playback. During recording with software monitoring, latency-inducing plugins on your monitoring path add their latency to the already-existing buffer latency. A linear-phase EQ on your vocal channel adds maybe 20ms; combine this with 10ms buffer latency and you're at 30ms total—uncomfortably sluggish for a singer.
Workflow Strategies
For tracking: Avoid high-latency plugins on monitored channels. Use zero-latency alternatives during recording:
- Minimum-phase EQ instead of linear-phase
- Standard compressor instead of look-ahead limiter
- Simple reverb sends instead of convolution
For mixing: Latency doesn't matter—use whatever plugins sound best. The DAW compensates automatically.
For live performance: Test the total latency of your signal chain including all plugins. Some plugins report their latency in the DAW's plugin window or mixer. Calculate whether the total is acceptable for your performance needs.
Troubleshooting Common Issues
Clicks and Pops
Sporadic clicks and pops usually indicate buffer underruns—the system can't process audio fast enough. Solutions:
- Increase buffer size (most reliable fix)
- Reduce plugin count or use more efficient plugins
- Disable background processes
- Check for DPC latency issues (Windows)—LatencyMon can diagnose
- Update audio interface drivers
Consistent Crackle
Steady crackling (rather than sporadic clicks) often indicates:
- Sample rate mismatch between DAW and interface
- Clock sync issues with multiple digital devices
- Faulty cables or connections
- Driver problems—try reinstalling or updating
Interface Disconnecting
If your audio interface periodically disconnects:
- Disable USB selective suspend (power management feature)
- Try different USB ports
- Check for firmware updates
- Test with a different USB cable
High CPU Usage
If CPU usage seems disproportionate to your plugin load:
- Check if multi-threading is enabled in your DAW
- Some plugins don't report their CPU usage accurately—disable suspected plugins to test
- Verify your power plan isn't throttling CPU speed
- Check CPU temperature—thermal throttling reduces performance
Latency Feels Wrong
If latency feels higher than your buffer setting suggests:
- Check for high-latency plugins in your monitoring path
- Verify your interface is using the correct driver (ASIO on Windows)
- Check the interface's own latency settings (some have internal buffers)
- Measure actual round-trip latency with a loopback test
Advanced: Measuring Actual Latency
Don't trust theoretical calculations—measure your actual system latency:
Loopback Test Method
- Connect an output of your interface to an input (with appropriate cable/attenuation)
- Create a short click or impulse in your DAW
- Record the click through the loopback
- Measure the sample offset between the original and recorded click
- Convert samples to milliseconds: (samples / sample rate) × 1000
This measures true round-trip latency including all sources—buffers, converters, drivers, and any monitoring path plugins.
Software Tools
RTL Utility (Windows): Measures round-trip latency automatically using loopback.
Oblique Audio Latency Test (macOS): Similar functionality for Mac.
Your DAW: Some DAWs include latency measurement tools. Ableton Live's "Reduced Latency When Monitoring" option shows current latency values.
Conclusion
Buffer size is one of the most impactful settings in your audio workflow, yet it's often set once and forgotten—or worse, left at whatever default the system chose. Understanding the trade-offs between latency and stability empowers you to optimize for each production phase.
For recording: minimize latency to preserve performance feel. For mixing: maximize stability to handle complex sessions. For live performance: find the sweet spot that balances both. And remember that buffer size is just one factor—system optimization, driver selection, and plugin choices all contribute to your overall experience.
The goal isn't achieving the lowest possible buffer size—it's achieving the latency you need with the stability you require. Sometimes that means accepting higher latency; sometimes it means investing in faster hardware. Understanding the trade-offs helps you make the right choice for your situation.